Start file sharing
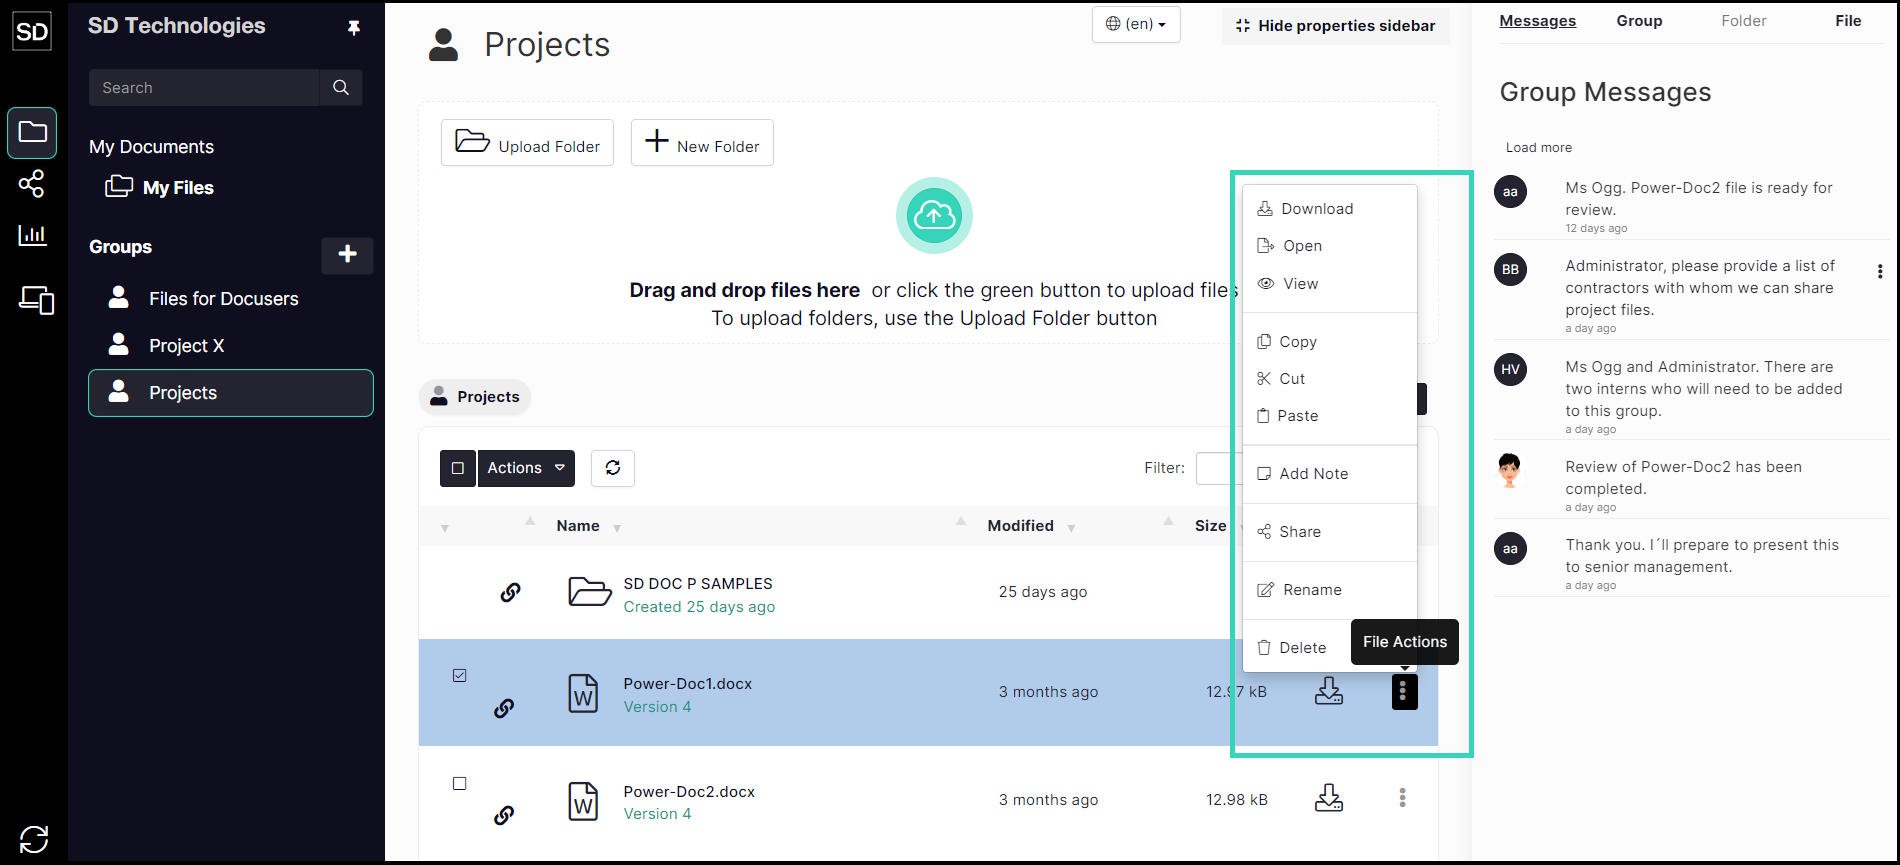
File sharing is initiated by clicking on the File Actions button and selecting Share from the pop-up menu. You can specify whether just the selected file(s) or the entire contents of the current folder are to be shared.
Note: sharing a folder does not share any sub-folders.
https://assets.suredrop.io/SureDrop-UserDocs-Images/SEN-SureDrop-File-FileActionMenu.png
Sharing procedure overview
Select the file you wish to share
Click on the ‘three dot’ button at the right-hand end of the selection.
From the pop-up menu that appears, select Share.
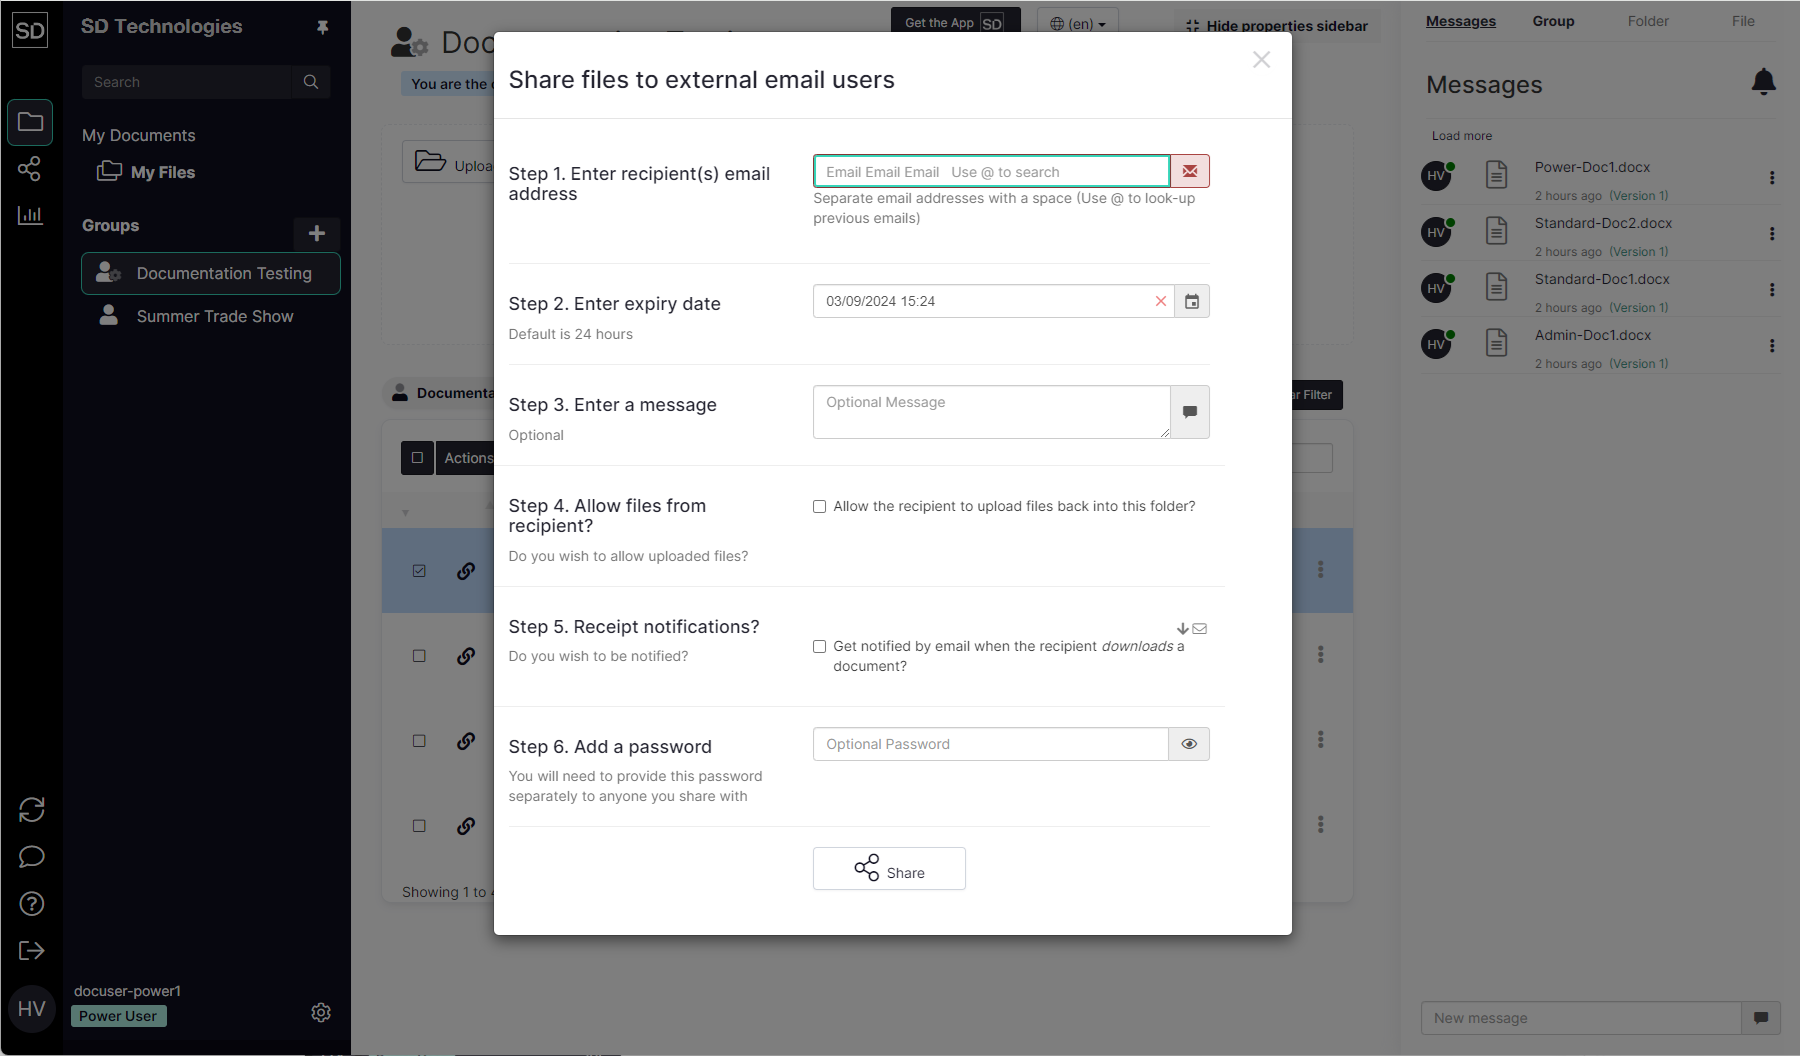
Selecting Share displays the dialog box shown below.
https://assets.suredrop.io/SureDrop-UserDocs-Images/SEN-SD-File-ShareFilesDialog-Overview.png
You can choose the people with whom you would like to share a file, the length of time for which it will be available and write an explanatory message to the recipients. You can also opt to receive a message back when a recipient has downloaded the file.
For an added level of security, you can also set a password on the file.
Step 1:
Enter one or more recipients, separating each with a space.

An example is shown below; the names you choose will be different.

Step 2:
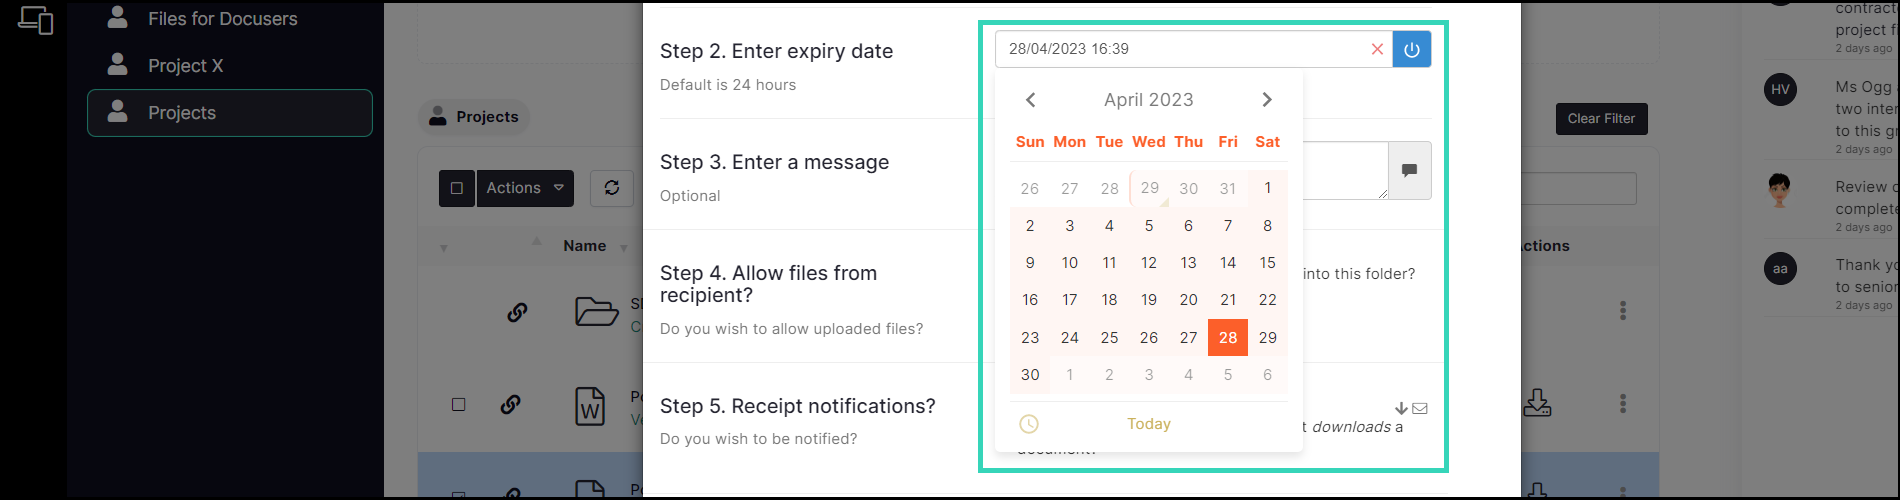
Specify how long the recipient has to access or download the files you are sending. Select or enter the date and time after which the sharing will no longer be allowed.
Note: By default files are available for one day; this is the 24-hour period after the share email has been sent.

From the pop-up calendar, select the date until which the shared file will be available. In the example below, 26 July has been selected.
Step 3:
Include an optional message that will be sent to the recipient as part of the notification. For example, briefly explain what the recipient needs to do with the file or why they are receiving it

The text you enter will appear in the email that notifies the recipient(s) that a file has been shared with them.

Step 4:
If required, select the check box to allow the recipient to upload files back into the source folder.

If this option is selected, you can also opt to restrict the recipient from downloading other files.

Step 5:
The Receipt notifications options also change so that you can be told that the recipient has either downloaded or uploaded a document.

The checkboxes change depending on what other fields have been selected.

Step 6:
To further secure your documents, you can attach a password to the file to prevent unauthorised viewing or reading.
